Welcome to another 86 Repairs Guide! In this series, we provide valuable data and maintenance and troubleshooting information for the equipment and infrastructure found in your restaurant. We hope this information will help you and your team become more informed about repairs and maintenance (R&M)—and save you time and money along the way.
It’s 2023, and comfort food remains king.
Americans already consume an estimated 4.5 billion pounds of French fries every year, and the National Restaurant Association’s State of the Restaurant Industry report suggests that fried chicken sandwiches will still be wildly popular on menus.
And let’s not forget that the National Chicken Council projected that Americans would consume 1.45 billion wings during this year’s Super Bowl—a 2% increase from last year.
That’s why the idea of a commercial deep fryer breaking down is fry-tening to any restaurant operator. You can’t give your customers the comfort food they crave if the equipment that creates it won’t work!
In this Guide, we’ll help you understand how commercial deep fryers work and give you routine maintenance guidance and troubleshooting tips to reduce downtime.
Table of Contents
What are commercial deep fryers?
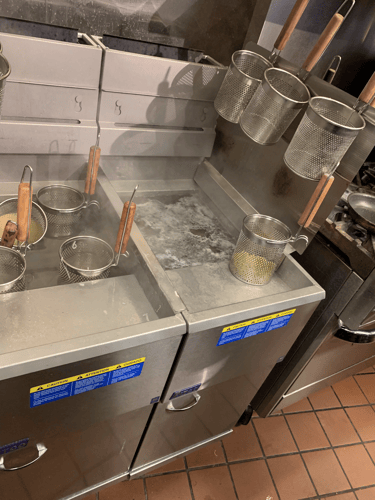
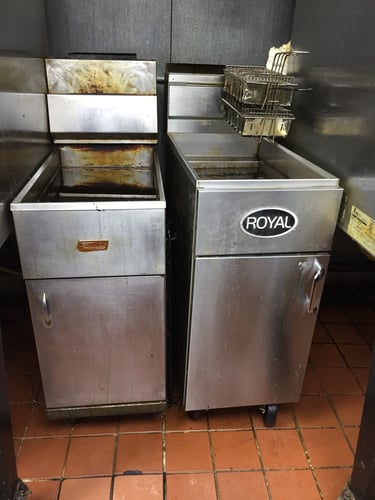
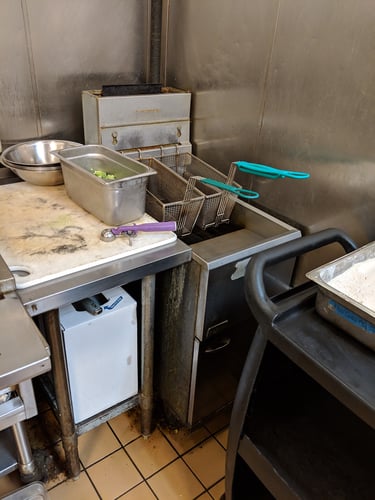
A commercial deep fryer has the capacity to cook a large amount of food by submerging it in hot oil. Even if you’ve never worked the line before, you’ve probably seen a fryer in action when you’re waiting in line to pick up some fast food, cooking batch after batch of French fries and chicken nuggets.
Fryers have two main components: an oil compartment and a fryer basket. Depending on the fryer, it’ll either use gas or electricity to heat the oil in the compartment to around 325-400°F.
Once the oil is at proper cooking temperature, food is transferred into the basket and then submerged in the oil. The exterior surface is cooked to a crisp, creating a barrier between the oil and the uncooked food.
Bubbles begin to form around the food when the hot oil has started to evaporate the water underneath the crisp exterior. This reaction steams the food underneath the surface. Once all of the water has evaporated, the bubbles disappear, and the food should be ready to come out of the commercial deep fryer.
Isn’t science fun? 🤓
Numbers to know about hot side equipment
What’s not fun? Paying more for repairs than you should. That’s why we collect vendor invoice data from our customers across North America—so other operators can benchmark what their vendors are charging and see if their rates are fair.
In 2022, our customers paid an average of $627.33 for vendor dispatch on hot side equipment, like commercial deep fryers. Thankfully, the first-time fix rate for this equipment is 91%, meaning the issue was resolved with just one vendor visit.
(Hungry for more restaurant equipment and infrastructure data? Get our annual report, The State of Repairs, for numbers you can’t find anywhere else.)
But when you consider customer appetites for fried foods, having a commercial deep fryer out of commission for even an hour can really fry your profits.
Maintenance for commercial deep fryers
Maintenance is critical to keep on cookin’. But before you begin, keep in mind that your commercial deep fryer’s manufacturer recommendations should always take precedence over ours. The last thing you want to do is accidentally invalidate a warranty if you wind up needing a repair!
Clean the fryer daily
Have you ever taken a big bite out of a chicken tender only to realize that something tasted…off? The chicken itself was fine, but the breading almost tasted burnt? That oil was overdue for a change.
Commercial deep fryers should be cleaned every day. Here’s how to do it properly:
- Lower the fryer oil to 120-130°F.
- Open the drain valve and flush out debris.
- Clear the drain, then use a fryer cleaning rod to remove any clogs. Shut the drain valve once finished.
- Spray cleaner inside the oil compartment. After it sits for a few minutes, use a scrubbing pad to remove debris.
- Rinse the oil compartment with water.
- Once the fryer is clean, dry it completely.
Some restaurants may prefer boil outs over daily cleaning, which are done every few weeks or once a month. This involves boiling a combination of cleaner and water in the oil compartment before flushing the unit.
If your restaurant goes the boil out route, always follow the directions included with your specific chemical cleanser. All options on the market have different time, volume, and temperature requirements.
Adjust food prep habits
We get it—cleaning the same piece of equipment every day is a drag. But you can make it a bit easier on yourself by making small adjustments to how you prepare fried foods.
Remove excess ice crystals from frozen foods before they go into the oil compartment. This will help preserve oil purity; it won’t have to work as hard to evaporate the water on top of the surface of the food.
You should also stop seasoning food above the fryer. Salt, pepper, and the Colonel’s 11 herbs and spices build up with other debris and burn, negatively affecting the oil quality.
In general, you and your team should aim to keep as much debris out of the fryer as possible. Always keep fryer skimmers on hand so any large pieces can be removed before the oil burns them.
Preserve the oil
As you may be able to tell, oil purity is key for commercial deep fryer maintenance. (It’s also critical to keeping fried foods craveable.)
Restaurants commonly use a fryer oil stabilizer that helps oil cook food at a lower temperature, protecting both the quality of the food and the oil itself. But if your kitchens go without it, be sure your staff knows the smoking point of the oil that’s used in the fryer. Common deep fryer oils include:
- Vegetable oil: 400-450°F
- Peanut oil: 450°F
- Canola oil: 400°F
When the oil is hotter than its smoking point, those fats break down and—you guessed it—create a funky flavor in your fried foods.
Restaurants should also allow fryer oil to cool during off-peak hours. Keeping the oil at a constant 325-400°F means it’s going to have to be changed more often than just at the end of the day. Consider the low-use times for your fryer, and lower the temperature accordingly to maintain the oil’s lifespan.
Troubleshooting for commercial deep fryers
Even well-oiled machines break down sometimes. So if you’re having issues with your commercial deep fryer, try troubleshooting before you call a vendor for service.
Keep in mind that some deep fryer models have digital displays that show error codes when the equipment falters. Use the error code to consult your fryer’s manual for precise troubleshooting steps before following the general advice below.
Oil won't filter
Your commercial deep fryer might have too much debris buildup. Restaurants should be changing fryer filter paper and cleaning screens regularly so solids are removed before passing through the pump.
It’s important to remember that all cleaning solution must be rinsed away and all moisture must be removed before filters or filtration devices are put back into the fryer.
If filters aren’t replaced frequently or if they’re out of alignment, or if moisture is present in the unit, the fryer may be destroyed—and cost you $2,000 or more to replace.
Double-check that your filters have been changed and cleaned recently, then move on to Unit won’t turn on/work correctly below for further troubleshooting.
Unit won't turn on/work correctly
First, verify that the unit has power:
- For electric commercial deep fryers, check the unit cord is plugged in on both sides and does not have excessive wear, examine the outlet, and verify all connections are tight. Reset the GFCI outlet, and toggle breakers to see if it’s an electrical issue.
- For gas or gas/electric combination commercial deep fryers, make sure the valve behind the unit is open and parallel to the gas line. Secure the gas line connection:
- Turn off the fryer, then close the gas valve.
- Disconnect the flexible gas lines from the unit, removing any kinks that may be present.
- Reattach gas lines. Be sure the collar snaps into place!
- Open the gas valve.
If power isn't the issue, check the pilot light:
- If the pilot light is out, skip to the Pilot light out section below.
- If the pilot is lit, look underneath the fryer compartment to ensure its filter is in place.
- If the pilot is on and the filter is in place, the fryer might have been working too hard. Find the red reset button on the fryer motor and turn it back on.
If none of the above triggers the unit to work properly, you’ll need to call a technician for service.
Pilot light out
The pilot light is the standing flame in the bottom compartment of the fryer. This should always be lit, even when the unit is not in use.
- If the flame is out, relight the pilot by toggling the gas knob off and on again. Push the knob in and light the pilot flame with a match. Be sure to hold the gas knob down for 30 seconds to one minute to ensure the pilot flame stays lit.
- If you try to relight the pilot and it won’t hold the flame, the unit has no power. Proceed with the Unit won’t turn on/work correctly troubleshooting steps above.
- If the pilot will light but won’t stay lit, there’s either a lot of carbon buildup or the sensor has failed.
- Clean the thermocouple with a dish scrubbing pad or steel wool.
- Use a stainless steel scouring pad on the sensor to remove buildup.
Keep in mind that most pilot systems have an automatic time-out built in. If you attempt to light the pilot unsuccessfully within a certain amount of time, you may need to toggle the gas knob off for up to 20 minutes before the unit will let you try again.
If the pilot still won’t light after following the troubleshooting steps above and waiting 20 minutes between attempts, contact a vendor for further assistance.
Warranties for commercial deep fryers
Like all other kitchen equipment, warranty coverage for commercial deep fryers varies by manufacturer. Henny Penny units might include a three-year limited warranty, but Frymaster products could have a one-year warranty on parts and labor.
Before proceeding with any maintenance, troubleshooting, or service calls, you want to have a full understanding of the scope of your warranty. Something as small as an out-of-place filter may invalidate the agreement, and the manufacturer may have specifications for who exactly can service the unit.
A final note on commercial deep fryers
Don’t get burned by commercial deep fryer downtime and extra vendor expenses. When you and your team commit to routine maintenance and troubleshooting common issues, you can be satis-fried that you’re taking extra steps to retain profits.